Homework_3 -- Using the Spartan3 Demo Board and Xilinx ISE Software

Revised on 09/07/2011 by D. Bouldin

Protected files:
synplify-quickstart.pdf (90 pages)
synplify-user-guide.pdf (912 pages)
The original PASS test file for the S3 Board can be downloaded to a PC by right-clicking on pass.mcs
D-FlipFlop
Login to ada3.eecs.utk.edu
hw3a-video.mov (protected Quick-Time Video; 70 MBytes)
NOTE-1: The tutorial tar file now includes a tcl file which allows Synplify to target the 100K part on the BASYS board.
NOTE-2: A modified version of hw3a can be used with ISE.
Color Slides (50-page protected pdf)
 .................

Spartan3 User Guide (64-page protected pdf)
S3 Board (Digilent)
Part B -- Using Xilinx ISE Software
You may use the Xilinx ISE software that has been installed on the PCs in 425 Ferris, or
you may install the free PC version of the Xilinx WebPack tools on your own PC by accessing WebPack.
Please note that filenames and paths should not include any spaces when using the Xilinx software.
Open ISE and from the menu select and download "Help-->Tutorials-->ISE Quick Start".
Follow the ISE Quick Start Tutorial to implement a VHDL counter.
Using ISIM: isim-fulladd.tcl produces
isim-fulladd-results
The project navigator indicates which steps have been completed.
To view the layout following place/route, in the Processes tab, expand "place & route" and
double-click the "View Routed Design (FPGA Editor)" process.
Use "screen-print" and "Paint" to capture the graphic.
Download the design to the Spartan3 Demo Board.
XST Reference (485-page PDF)
Part C -- Synthesizing and Downloading Your Own Design
Now, synthesize a VHDL source file that will allow your name or initials to be scrolled
in either the right-to-left (LEFT) direction or the left-to-right (RIGHT) direction.
Upon power-up, all of the digits in the display should be blank.
The slide switches, swt<7:0>, should be read and the corresponding LEDS, led<7:0>, affected.
When btn0 is pressed (properly), the segments, seg<7:0>, corresponding to swt<7:0>
should be displayed in the right-most digit position, dig(0).
After a 3-second delay, the character should be shifted left one digit
and the state machine should wait for the next pressing of btn0.
When this occurs, the slide switch positions should activate the corresponding segments
and a second digit displayed in dig(0).
Continue this until all characters have been read which will be indicated whenever the
input switches are equal to all 1's and a blank character is inserted into the scrolling value.
The 4-digit display should then begin scrolling in either the LEFT (swt<0>=1) or the
RIGHT (swt<0>=0) direction at a speed that makes the characters easy to read.
Note that your internal buffer should contain more than 4 characters.
Hint: Adapt hw3a and/or disp_mux.vhd
(disp_mux_block) from page 90 of the textbook.
Check out this 2-min video.
Check out this example on YouTube.
Be prepared to demonstrate the working design on your Spartan3 Demo Board.
Preferably, you can make a video of your scrolling display and post it on your website.
Grab your own post-layout simulation for each part of hw3.
Link them and your VHDL source file and the stim file to your protected website.
Link your results to your protected webpage and update hw.html
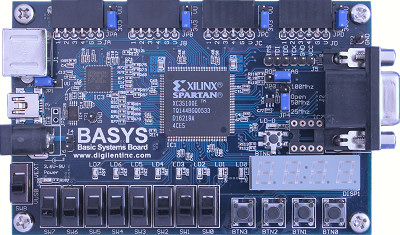
BASYS-Website
BASYS-ADEPT
BASYS-pinout.ucf
BASYS-CD
BASYS-Demo
dbouldin@tennessee.edu