XHTML Images
This section covers adding
images to your page and several methods for controlling the flow of text around
images.
Inserting images
Images are inserted using the
img element. The most common formats for images are GIF,
JPEG, and PNG. The src
attribute specifies the image's location
on either the local file system or the Web, and the alt attribute specifies a text string that should be
displayed if the browser cannot load the image.
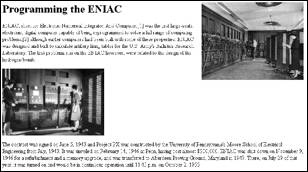
<h1>Programming
the ENIAC</h1>
<img src="eniac.jpg" alt="The
ENIAC" />
<p>This monster
occupied an entire room, but was programmable.</p>
Here are some ideas to
consider when using images.
- To make the image appear on its own line, use a
p or br
element before the img element.
- For large images, make a smaller version (i.e., a
thumbnail) to decrease the time needed to load the image.
- The alt
attribute is required by HTML and XHTML. The value for alt is also commonly displayed as a tooltip when the
user hovers the mouse over the image for a few seconds. A similar attribute,
title, also exists that most browsers use to generate
a tooltip.
- To prevent the display of a tooltip (e.g., images
used for bullet points in an unordered list), use title="" and alt="".
Specifying image size
The width and height
attributes control an image's dimensions. When these attributes are specified, the
browser can construct the page more quickly because it can render the page and
download the image in parallel. Otherwise, the browser must first download the
image to determine its dimensions and then render the remainder of the page.
<h1>Programming
the ENIAC</h1>
<img
src="eniac.jpg" alt="The ENIAC" width="400"
height="310" />
<p>This monster
occupied an entire room, but was programmable.</p>
The width and height attributes can also
be used to scale an image. For example, if the image is 400×310 pixels
and you want to display it half-sized, specify width="200" and height="155".
A few things to note about
specifying an image's width and height:
- Percentages can be used; however, the values are
relative to the browser window, not the image itself.
- It's not necessary to supply both size attributes
– if you adjust one, the browser will automatically adjust the
other. For example, to display the above image half-sized, the following
would suffice:
<img src="eniac.jpg"
alt="The ENIAC" width="200"
/>
- Scaling the image by adjusting the width or
height does not change the image size. In other words, the browser still
has to download the full image, even if that image is being displayed with
smaller dimensions. If you want the page to load quickly, a better
solution is to make a separate, smaller image to use as a thumbnail. If
the user wants to see the entire image, the user can then click on the
thumbnail image. As an example, the following markup code links a
thumbnail image, eniac_thumb.jpg, to the full-sized image, eniac.jpg.
<a href="eniac.jpg"><img
src="eniac_small.jpg"
alt="The Eniac" /></a>
Images and page layout
Floating images
The align attribute can make an image float along one side of
the page, with text and other elements wrapping around the other side. NOTE: This attribute is deprecated because style sheets are
more commonly used to control image layout. The markup and sample output below
demonstrate left floating.
<img src="eniac.jpg"
alt="The ENIAC" align="left"
/>
<h1>Programming
the ENIAC</h1>
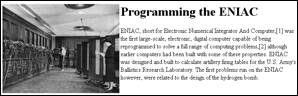
<p>ENIAC, short
for Electronic Numerical Integrator and Computer, ...</p>
...
Alternatively, specifying align="right" yields the following sample output:
Different images can have
different float types. The key is to place each img
element directly before the text that it should disrupt. The markup and
sample output below demonstrate left and right floating.
<img
src="eniac.jpg" alt="The ENIAC" align="right"
/>
<h1>Programming
the ENIAC</h1>
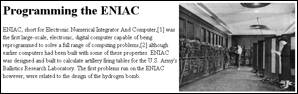
<p>ENIAC, short
for Electronic Numerical Integrator and Computer, ...</p>
<img
src="eniac2.gif" alt="Another Picture" align="left" />
<p>The contract
was signed on...</p>

Stopping elements from wrapping
A floated image affects all
the elements that follow it, unless a br element
with the clear attribute is used. To force the text to follow the
image use <br
clear="all" />. If you have
several consecutive images, some of which are left-aligned and some of which
are right-aligned, you may want text to follow the left-aligned images but flow
around the right-aligned images. In this case you would use <br clear="left"
/>. Alternatively, if text should flow
around the left-aligned images and follow right-aligned images you would use <br clear="right"
/>. Any text after the img element but prior to these br elements will still flow around the image.
As an example, here's the
original markup without line breaks and the corresponding sample output:
<img
src="eniac.jpg" alt="The ENIAC" align="right"
/>
<h1>Programming
the ENIAC</h1>
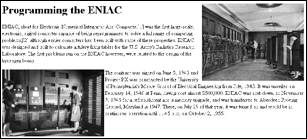
<p>ENIAC, short
for Electronic Numerical Integrator And Computer...</p>
<img
src="eniac2.gif" alt="The ENIAC" align="left"
/>
<p>The contract
was signed on...</p>
The bottom-left image fills
in some of the whitespace under the first paragraph. In particular, part of the
bottom left picture and the first two lines of the second paragraph flow around
the right picture. To prevent this, you can put a line break after the first
paragraph indicating that succeeding text and/or images should follow the right
picture. The red line in the resulting output below shows how the bottom of the
first image is flush with the top of the second image.
<img
src="eniac.jpg" alt="The ENIAC" align="right"
/>
<h1>Programming
the ENIAC</h1>
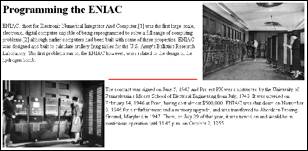
<p>ENIAC, short
for Electronic Numerical Integrator And Computer...</p>
<br clear="right" />
<img
src="eniac2.gif" alt="The ENIAC" align="left"
/>
<p>The contract
was signed on...</p>
To have the second image,
which is aligned on the left margin, display before the next paragraph, you can
place a line break after that image.
<img
src="eniac.jpg" alt="The ENIAC" align="right"
/>
<h1>Programming
the ENIAC</h1>
<p>ENIAC, short
for Electronic Numerical Integrator And Computer...</p>
<img
src="eniac2.gif" alt="The ENIAC" align="left"
/>
<br clear="left" />
<p>The contract
was signed on...</p>
Adding space around images
You can add spacing between
images and text by using the img element's vspace and hspace attributes. The
values of these attributes are the number of pixels to use as spacing. NOTE: These attributes are also deprecated in favor of
style sheets, which allow greater control over the spacing around images.
A few things to note about
vertical and horizontal spacing:
- It is not necessary to specify both the hspace and vspace attributes.
- The disadvantage of using these deprecated
attributes is that the same amount of space is added to the top/bottom (vspace) or left/right margins (hspace) of the image. Style sheets allow you to control
the spacing assigned to each margin.
The following example puts 40
pixels of vertical space and 20 pixels horizontal space around the first image,
and then puts 30 pixels of horizontal space around the second image. NOTE: The blue boxes indicate the spacing.
<img
src="eniac.jpg" alt="The ENIAC" align="right" vspace="40" hspace="20"
/>
<h1>Programming
the ENIAC</h1>
<p>ENIAC, short
for Electronic Numerical Integrator And Computer...</p>
<img
src="eniac2.gif" alt="The ENIAC" align="left" hspace="30" />
<p>The contract
was signed on...</p>

Aligning images with text
To align inline images with
text, use the align attribute of the img element.
There are six alignment types:
- absbottom: Align the bottom of this image with the bottom
of the largest text item on this line.
- absmiddle: Align the middle of this image with the middle
of the largest text item on this line.
- bottom: Align the bottom of this image with the
baseline of the text.
- middle: Align the middle of this image with the
baseline of the text.
- texttop: Align this image with the tallest text in the
line. May behave exactly like top in some browsers.
- top: Align this image with the theoretical tallest text element in
the line.
The markup and sample output
below demonstrate the use of each of the image alignment types.
<p><img
src="triangle.png" alt="tri" align="texttop"
/>default
<img
src="square.png" alt="sq" align="absbottom" />
absbottom</p>
<p><img
src="triangle.png" alt="tri" />default
<img
src="square.png" alt="sq" align="absmiddle" />
absmiddle</p>
<p><img
src="triangle.png" alt="tri" align="texttop"
/>default
<img src="square.png"
alt="sq" align="bottom" /> bottom</p>
<p><img
src="triangle.png" alt="tri" />default
<img
src="square.png" alt="sq" align="middle" /> middle</p>
<p><img
src="triangle.png" alt="tri" />default
<img
src="square.png" alt="sq" align="texttop" />
texttop</p>
<p><img
src="triangle.png" alt="tri" />default
<img
src="square.png" alt="sq" align="top" />
top</p>
