Thor's Beef Ribs (Recipe with Pictures)

These days it's difficult to find a restaurant that serves good
beef ribs. Tony Roma's was a staple, but their Knoxville restaurant
went out of business a few years ago. That prompted me to start trying
to make them myself. This recipe has its seeds in a recipe from
Weber's Big Book Of Grilling (by J. Purviance and S. S. McRae,
Chronicle Books, San Francisco, 2001), but this is much simpler.
Beef ribs are also hard to find in stores. You do best to call ahead,
and order if you have to. The down side of that is that they can be
expensive. The last ribs that I bought were $2.69 per pound, and had
to be ordered from Bi-Lo.
Ribs come in "slabs," with between seven to nine ribs per slab.
Our rule of thumb in grilling for parties is 3 ribs per person.
(I usually eat six or so...).
They're big.
Ingredients
- Beef Ribs
- Paprika
- Salt
- Pepper
- Garlic
- Cheap store-bought barbecue sauce (roughly 1 bottle per two slabs)
- Red Wine (preferably cabernet)
Step 1: The Day Before -- Rubbing the Ribs
First take a fork and poke holes through the fat layer in the back. This
may not do anything, but I like to think that it does. Unlike pork ribs,
there's no reason to remove that fat -- just poke the holes.
Then cut the slabs
into two and three-rib segments. This makes them easier to grill.
Then mix the rub -- equal parts paprika, salt, pepper and garlic -- and
rub it over the top and sides of the ribs.
Be liberal. Don't bother rubbing the fat layer on the
back -- nothing will penetrate it.
Cram the ribs into plastic bags and
put them in the fridge until it's grilling time.

The rub ingredients -- simple and cheap.

A rack with rub.

Eight racks, crammed into six bags and about to enter the fridge
for the night.
Step 2: The Sauce
Start the sauce before you start grilling. Use a
wide sauce pan or dutch oven, because you will be dipping the
ribs in it. For each bottle of barbecue sauce, use at least
half as much red wine. Do it to taste. Then add a clove or
two of crushed garlic per bottle of barbecue sauce.

Sauce ingredients. Cheap BBQ sauce + cheap wine = excellent sauce.
I ended up using five bottles for the eight racks of ribs.
Step 3: Grilling
Start grilling about 3 1/2 hours before you want to eat the ribs.
At this point, also preheat the oven (see below for temperature).
So, if you're using charcoal, start it about four hours before
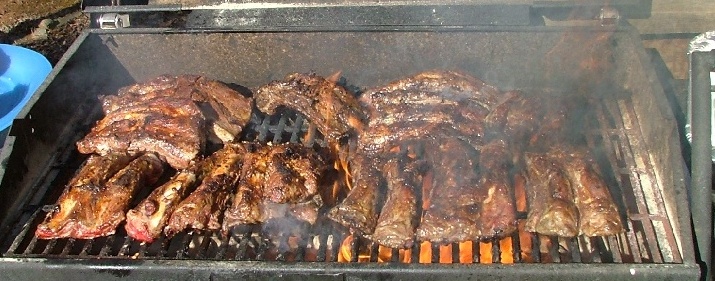
eating time. Once the coals are hot, grill the ribs under direct, high heat.
First, do the non-fat side, then the fat side. You are not cooking them
here, you are just giving them flavor -- get the meaty side a little
black, then flip them over, and the dripping fat from the other side
will likely engulf them in flames. Do this for a bit, then set them
aside for step four. My grill is nice in that you can raise and lower
the charcoal -- I usually raise it for grilling the meaty side, and
lower it for the fatty side. If you can't fit everything on the grill,
that's ok -- grill them in shifts.

Before lighting the charcoal -- I use one layer of charcoal to span
the grilling surface.

The first ribs go on the grill, meaty side down.

The fatty side causes a charcoal-inferno
Step 4: Cutting and Dipping
When the ribs are done grilling, cut them into individual pieces, dip them
into the sauce, and put them into a casserole/oven dish.

The ribs are off the grill, and ready for the cutting and dipping.

This is a good opportunity for father-son bonding.
Also, I'm thinking that this is a job that should be done outside, near
the grill -- if you accidentally drop a rib or two into the sauce,
it can be rather messy.

The ribs after cutting and dipping.
Step 5: Cooking
You can cook the ribs for varying times. I used to cook them for two
hours at 300 degrees. Now, I'm cooking for three hours at 275 degrees.
Your choice.
I think that the longer time is better. Cover the ribs with aluminum
foil, put them into the oven, and don't think about it again.
True hatchet-throwing grillers will probably insist that you do
this part in the grill, but I don't think that it imparts any
extra flavor, and it's a pain.

Ribs in the oven.
Step 6: Eating
You're done -- eat up with the remaning sauce (which I keep hot during the
cooking process).

All grab for the ribs.
You'll note, they create a lot of grease -- usually we move them to another
tray, but we were lazy here.

Happy teens.