 Alive
has one sensor connected to one motor, so for this section, you will
use only the center light sensor, and will feed the same data to both
of your robot's motors.
Alive
has one sensor connected to one motor, so for this section, you will
use only the center light sensor, and will feed the same data to both
of your robot's motors. Some of Valentino Braitenberg's most well-known work centers on thought experiments with what he calls "vehicles." These vehicles have simplistic controls, yet exhibit apparently complex behavior. Each experiment details a vehicle that has a small set of sensors, and how those sensors can be connected to the vehicle's motors in ways that mirror the neurological connections in living creatures. The resulting vehicles seem to be capable of complex behaviors like fear, aggression, love, free will, etc.(paraphrased from Learning Computing With Robots, edited by Deepak Kumar)
In his work, Braitenberg describes what he calls the Law of Uphill Analysis and Downhill Invention: "It is much more difficult to guess the internal structure of an entity just by observing its behavior than it is to actually create the structure that leads to that behavior." In other words, it is easier (a downhill task) to create one of Braitenberg's vehicles than it is to explain their behavior with no knowledge of their inner workings (uphill analysis).
In this lab, you will program your robot to emulate five of Braitenberg's vehicles, using the light sensors as the "small set of sensors" Braitenberg describes. You will begin with the most basic vehicle, Alive.
The main topics you may need in this lab are:
Alive
has one sensor connected to one motor, so for this section, you will
use only the center light sensor, and will feed the same data to both
of your robot's motors.
You may have noticed the light sensors are on the "back" of the robot. We want the robot to move towards the light, so you will need to set the "forwardness" of the robot to "scribbler-forward." [The command is robot.setForwardness("scribbler-forward").] Do not forget to reset the forwardness to "fluke-forward" when you are done in preparation for your next lab!
Start at part 3. As you have learned in lectures, we need to use a
looping structure of some kind to make our program "repeat" any
behavior. For this first vehicle, we will make the vehicle run for 30 seconds.
Myro provides a function called "timeRemaining(int seconds)" that
you can use within a while loop to run some behavior for a given
ammount of time.
There are several ways to purposefully implement an endless loop. The key to doing so is to deliberately exclude the stopping condition. For example, you might use the code while (number != 3) as a part of your program (you may assume that number is a variable of appropriate type, and that the code contained in the loop has some way of updating the value of number). "number != 3" returns a boolean value based on whether or not number equals 3. If number's value is 25, then "number != 3" evaluates to "true". The loop sees that its condition for continuation is true, and it repeats its behavior. Similarly, if number's value is 3, "number != 3" will be false, and the loop will stop. So, if we write code like this: while (true), the loop will always see its condition as true, and will not stop unless we tell it to. (In this case, we'll use ctrl+c to interrupt the program and to tell the loop to stop - more on that later.)
Reminder: You need to connect to your robot before you try to use any functions that begin robot.something - otherwise it will segfault
You can use any method that will move the robot forward in place of motors(). We've used motors() solely because it will make adapting the code used in Alive to code that can be used in the other vehicles easier later. In Alive, one sensor feeds data to one motor. We mimic this by feeding the same data to each motor. Later, in the code for other vehicles, we'll feed different data to each motor.
Before you test anything, there are few more steps. The light sensors read in values from 0 to 5000, where 0 is the brightest and 5000 represents darkness; however, the motors() function can only take values from -1.0 to 1.0. To compensate for this, we will need to normalize the sensor input so that it will make sense to the motors. Take a look at the code below, but do not add it to your program yet:
This code works in a situation where the robot is in complete darkness, except for the light source it is seeking. To adjust the function so that it will work in a room that is not completely dark, and so that it will respond to a flashlight as its "light source," we need to know the amount of light that is in the room when the robot is turned on. We'll call this our ambient lighting. We'll need a specially-positioned variable to collect this data. (Don't worry about why this works yet - you'll talk about scope, the principle that makes this bit of code possible, in a week or so.)
A Note: Make sure you are not shining the
flashlight into any of the sensors when you start your program. This
will give you incorrect data, and will cause problems as your program
runs.
We divide v, our current light reading, by the ambient light value. We subtract the resulting number from 1.0, because while a lower light value means brighter light, a lower speed means, well, a slower robot. Subtracting v/ambient from 1.0 gives us a speed equivalent for the proportion. For example, if the ambient light reading was 500, and the current light reading was 100, the number 0.8 would be passed to motors(). The vehicle would move forward at .8 of its full speed, 1.0. In the event that the robot reads a darker value than the ambient reading, we would get a negative value. This is why we compare 1.0 - v/ambient and 0.0 and determine which value is greater: by doing this, the robot only goes forward, and follows only the described behavior. (If you are curious, by all means, remove the check and observe the robot's behavior. Be sure to put it back before you continue your work!)
As previously mentioned, in the normalization function, we compare 1.0 - v/ambient and 0.0, and return the greater of the two values. Another way to do this would be simply to return max( 1.0 - v/ambient, 0.0), which accomplishes the same thing.
At this point, you should add a call to Alive to the main() function of your code. Compile your code with the provided makefile, and run your program. Observe your robot's behavior.
Before you begin the next phase of your lab you'll want to modify your main function in braitenburg.cpp to make it easier to control your robot.
Additionally, you'll want to stop your robot from moving when a particular command expires (otherwise "alive" or a similar mode might cause it to drive off). To do this simply call robot.motors(0,0) once you return to the loop control.
 We'll
now move on to vehicles that receive input from two sensors. Coward and
Aggressive both follow light, but Coward moves away from a light source
on one side, and Aggressive will move toward it.
We'll
now move on to vehicles that receive input from two sensors. Coward and
Aggressive both follow light, but Coward moves away from a light source
on one side, and Aggressive will move toward it.
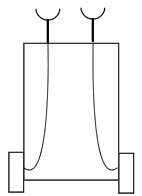
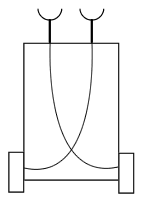
For Coward, you will feed the data from the left light sensor to the left-side motor, and the data from the right light sensor to the right-side motor. For Aggressive, you feed the data from the left light sensor to the right-side motor, and the data from the right light sensor to the left-side motor. You can adjust the code from Alive for each of these vehicles.
At this point, because you are reading in data from more than one sensor, you should change the way you calculate the ambient lighting. You need to adapt your code so that it takes the readings of all three light sensors into account, by finding the average readings from all of the sensors.
Up until now, we've been using an excitatory normalizing function; that is, the darker the light values are, the closer the returned value is to 0. Thus, as the environment gets darker, smaller values are passed to the motors, and the vehicle moves more slowly. Think of it as if the vehicle gets excited as the light gets brighter, and moves forward. For Love and Explorer, the final vehicles, we'll need an inhibitory normalizing function. In this case, the greater the quantity of light reported by the sensors, the slower the motors will turn.
Let's take another look at our first normalization function:
The behavior of the inhibitory normalization function will be almost exactly the opposite of the behavior of our first, excitatory function. If the inhibitory function was passed a current light reading of 100, with an ambient reading of 500, it would return 0.1, and the robot would move forward at 0.1 of full speed. In the event that a high number is passed to the function, say, 1000, we have a problem. In that case, the function would return 2.0, unless we add a check similar to the one we added to our first normalize function. The largest number our function should ever return is 1.0.
Now that you are done, be sure to look over all of your code. Check to be sure you have added the appropriate comments and documentation, and that there are function calls for each vehicle's method in your main function. Once you are sure everything is in order, you may turn in your lab.