CS202 -- Lab 3
What you submit with this lab
You are going to submit one file: pgm.cpp. This is going to implement the
methods defined in include/pgm.hpp. The TA will compile your pgm.cpp
with his or her version of include/pgm.hpp and src/pgm_tester.cpp, and
then he or she will run the gradescript on it.
The Lab
Back to PGM files.
The structure of this lab is like the structure of
the
lecture notes on Classes, Header/Source/Object/Executable Files.
What I want you to do is the following, in the directory in which you are working
(this assumes you are on a lab machine):
cp -r /home/jplank/cs202/Labs/Lab3/src .
cp -r /home/jplank/cs202/Labs/Lab3/include .
cp -r /home/jplank/cs202/Labs/Lab3/pgm .
cp /home/jplank/cs202/Labs/Lab3/makefile .
mkdir obj
mkdir bin
If your work is in a git repository, I also suggest that you do the following:
touch bin/.keep
touch obj/.keep
cp /home/jplank/cs202/Labs/Lab3/.gitignore .
git add .gitignore obj/.* bin/.* src/* include/* pgm/* makefile
You will now have five directories: include,
src,
obj bin and pgm. The first four mirror the lecture notes, and the
last has pgm files that you can use for testing. In
include/pgm.hpp, there is a definition of a PGM
class. The description of the class is in the include file, so go ahead and read it:
/* Header file to define the PGM class, that lets you manipulate PGM files.
   The files themselves are simply stored in a vector of vectors of ints.
   All of the methods return true if they succeed and false if they fail.

   Write() needs to produce files in a specific format:

      - P2 on its own line, no spaces.
      - cols rows on the next line, separated by a space, no additional spaces
      - 255 on its own line, no spaces.
      - Then the pixels: 20 pixels per line, one space between pixels, no additional spaces.
      - You don't print additional newlines at the end of each row of pixels -- just
        start the next row of pixels.
      - The last line is the only one that can have fewer than 20 pixels.
      - To give an example, if the picture has two rows and 11 columns, and all of the
        pixels have values of 5, then the pixels will look like:

5 5 5 5 5 5 5 5 5 5 5 5 5 5 5 5 5 5 5 5
5 5
 */

#pragma once

#include <vector>

class Pgm {
  public:
    bool Read(const std::string &file);           // Reads a PGM file
    bool Write(const std::string &file) const;    // Writes a PGM file
    bool Create(size_t r, size_t c, size_t pv);   // Creates a rxc PGM with the given pixel value
    bool Clockwise();                             // Rotates 90 degrees clockwise
    bool Cclockwise();                            // Rotates 90 degrees counterclockwise
    bool Pad(size_t w, size_t pv);                // Adds a border of w pixels with the given value
    bool Panel(size_t r, size_t c);               // Makes rxc copies of the PGM
    bool Crop(size_t r,    size_t c,
              size_t rows, size_t cols);         // Crops from r:c to (r+rows):(c+cols)
  protected:
    std::vector < std::vector <int> > Pixels;
};
|
This is all straightforward. Your job in this lab is to implement all of the methods,
with the exception of Read(), which is already written for you in src/pgm.cpp.
Pay attention to the format of Write(), which is specified in the opening comments
at the beginning of the file.
As in the Tic-Tac-Toe lecture, there is a separate testing program, in
src/pgm_tester.cpp. I'm not going to include it
here because it is so straightforward. The testing program allows you to test each method:
UNIX> echo '?' | bin/pgm_tester
usage: pgm_editor [prompt] - commands on standard input

        READ filename             - Read the PGM file
        WRITE filename            - Write the stored PGM to the file
        CREATE rows cols pixvalue - Call Create()
        CW                        - Call Clockwise()
        CCW                       - Call Cclockwise()
        PAD pixels pixvalue       - Call Pad()
        PANEL r c                 - Call Panel()
        CROP r c rows cols        - Call Crop()
        Q                         - Quit
        ?                         - Print commands
UNIX>
The makefile allows you to compile everything, putting object files in the obj
directory, and putting the binary in bin/pgm_tester. Let me give you some examples.
Under each example, I have the picture that is created:
UNIX> bin/pgm_tester 'PGM>'
PGM> CREATE 50 200 0
PGM> WRITE pgm/example_create.pgm
PGM>
 PGM>
PGM> READ pgm/Red.pgm
PGM> CW
PGM> WRITE pgm/example_cw.pgm
PGM>
PGM>
PGM> READ pgm/Red.pgm
PGM> CW
PGM> WRITE pgm/example_cw.pgm
PGM>
 PGM>
PGM> READ pgm/Red.pgm
PGM> CCW
PGM> WRITE pgm/example_ccw.pgm
PGM>
PGM>
PGM> READ pgm/Red.pgm
PGM> CCW
PGM> WRITE pgm/example_ccw.pgm
PGM>
 PGM>
PGM> READ pgm/Rodney.pgm
PGM> PAD 30 0
PGM> WRITE pgm/example_pad_1.pgm
PGM>
PGM>
PGM> READ pgm/Rodney.pgm
PGM> PAD 30 0
PGM> WRITE pgm/example_pad_1.pgm
PGM>
 PGM>
PGM> PAD 30 255
PGM> PAD 1 0
PGM> WRITE pgm/example_pad_2.pgm
PGM>
PGM>
PGM> PAD 30 255
PGM> PAD 1 0
PGM> WRITE pgm/example_pad_2.pgm
PGM>
 PGM>
PGM> READ pgm/Red.pgm
PGM> PANEL 2 4
PGM> WRITE pgm/example_panel_1.pgm
PGM>
PGM>
PGM> READ pgm/Red.pgm
PGM> PANEL 2 4
PGM> WRITE pgm/example_panel_1.pgm
PGM>
 PGM>
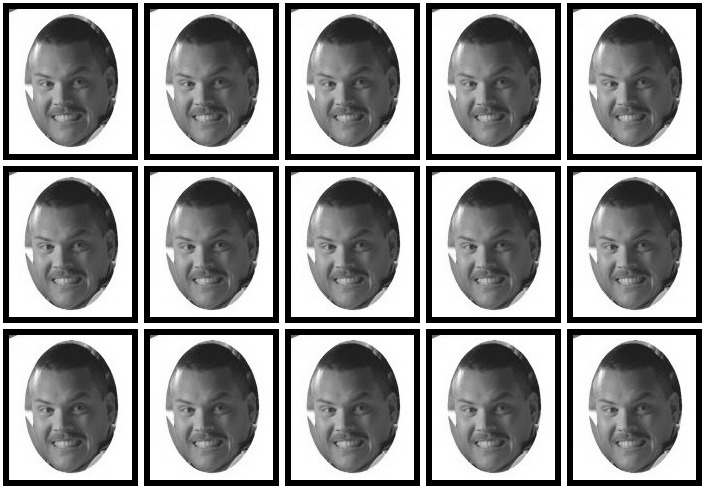
PGM> READ pgm/Rodney.pgm
PGM> PAD 6 0
PGM> PAD 3 255
PGM> PANEL 3 5
PGM> WRITE pgm/example_panel_2.pgm
PGM>
PGM>
PGM> READ pgm/Rodney.pgm
PGM> PAD 6 0
PGM> PAD 3 255
PGM> PANEL 3 5
PGM> WRITE pgm/example_panel_2.pgm
PGM>
 PGM>
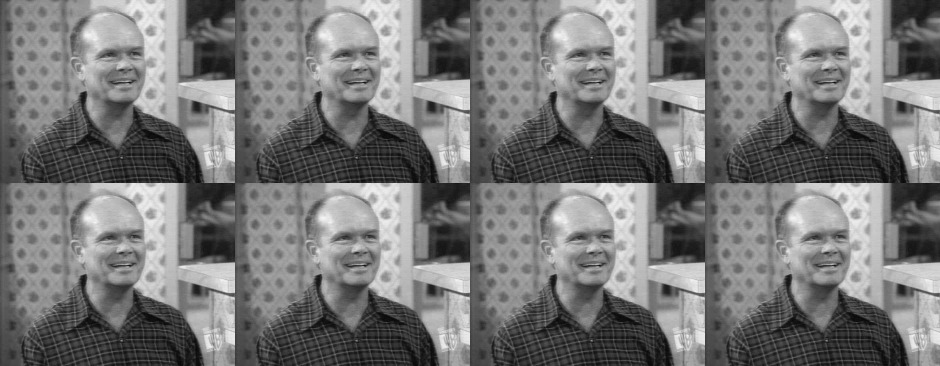
PGM> READ pgm/Red.pgm
PGM> CROP 45 60 50 100
PGM> WRITE pgm/example_crop.pgm
PGM>
PGM>
PGM> READ pgm/Red.pgm
PGM> CROP 45 60 50 100
PGM> WRITE pgm/example_crop.pgm
PGM>
 PGM>
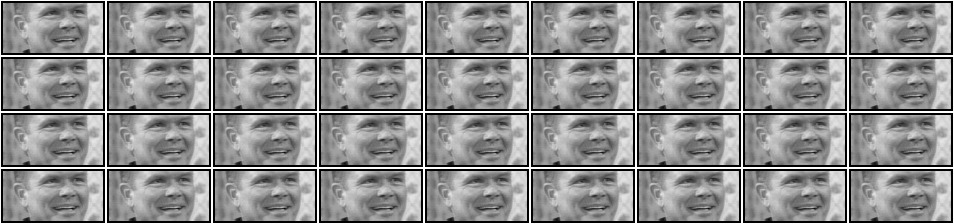
PGM> READ pgm/Red.pgm
PGM> CROP 45 60 50 100
PGM> PAD 2 0
PGM> PAD 1 255
PGM> PANEL 4 9
PGM> WRITE pgm/example_crop_panel.pgm
PGM>
PGM>
PGM> READ pgm/Red.pgm
PGM> CROP 45 60 50 100
PGM> PAD 2 0
PGM> PAD 1 255
PGM> PANEL 4 9
PGM> WRITE pgm/example_crop_panel.pgm
PGM>
 PGM>
PGM> Q
UNIX>
PGM>
PGM> Q
UNIX>
Grading and Starting
To start this lab -- and do this during lab if you can, write dummy versions of the
methods that don't work, but that compile when you type make.
That way you can make bin/pgm_tester, and you can start writing code and testing.
I would do Write() first, and then do the rest in whatever order you want.
The gradescript assumes that you program is in bin/pgm_tester
To reiterate, the only think you should submit is src/pgm.cpp.
BTW, in 2019, the TA's Kody Bloodworth and ChaoHui Zheng wrote up some supplementary
information. I have linked it here, in the file Supplement.pdf.
One issue -- under "crop", it should say "top left" where it says "top right".