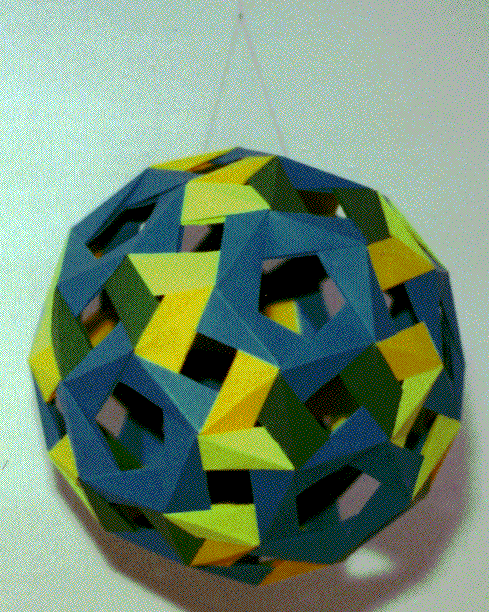
This is a difficult polyhedron to make because the creases do not hold together very tightly. It will hold together and look nice if you make sure not to move it or breathe on it. Otherwise, you have to glue it. Unfortunately, you have to be careful how you glue it. If you try to glue the completed model, you will be frustrated by the instability. If you try to glue the model incrementally, it may not fit together very well. My best strategy has been the following: First, make all the tr--sq modules, and from them, make two cuboctahedrons. Now glue just the triangles, let it dry, and take the cuboctahedrons apart. Use four of these triangles and the remaining twelve tr--sq modules and make another cuboctahedron. Glue together the remaining four triangles. You should now have twenty glued triangles. Make five sq--sq modules, and combine them with ten of the sq--pe modules to make a pentagonal prism. Glue the pentagons together. When it is dry, take it apart, and repeat this five more times until you have twelve glued pentagons. Now, assemble the rhombicosidodecahedron and glue the remaining joints. This is a time consuming process, and it will take some thought to ensure that you're doing the colors properly, but you end up with a nice-looking, polyhedron.
Coloring number 1: I made this one once with two colors, one for each type of module. It was ugly because all the triangles were the same color. I'd recommend one of the other colorings.
Coloring number 2: Split the modules into three colors (20 sq--pe and 20 tr--sq of each color). Arrange the modules so that each square has edges of the same color. Then arrange the squares so that all trianges have edges of all three colors. This can be done by arranging the squares as if they were edges of a dodecahedron, where each edge of the pentagon is never adjacent to an edge of the same color (this is the first coloration of the dodecahedron suggested above).
Coloring number 3: Use four colors. Color all of the sq--pe modules with color 1. Then divide the remaining modules into 20 each of colors 2, 3, and 4. Now, all the pentagons will be the same color. Make all the triangles have an edge of each color. For a nice effect, you can arrange it so that each square has opposite edges of the same color (this is analagous to coloring the edges of a dodecahedron so that no touching edges have the same color). If you're gluing the triangles beforehand, glue 16 of them so that colors 2, 3, and 4 are arranged clockwise in the triangle, and glue the other four so that they are arranged counter-clockwise.
Coloring number 4: I once tried a coloring that is symmetrical from top to bottom. I.e. start by making the top and bottom pentagons color 1. Then make all the edges emanating from them have color 2. Complete the triangles with color 3 (perhaps have color 3 form the decagonal band concentric to the top pentagon). Continue in some similar fasion. It was really ugly, so I converted it into two cuboctahedrons and six pentagonal prisms, and tried a different coloring.
